Track's On-Line Help Center
How To's
Dovetail Forming Chisel Instructions

#Tool-Dovetail tempered steel dovetail forming chisel.
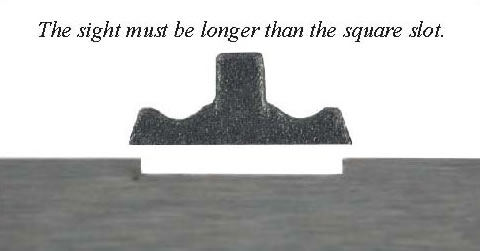
Figure 1.
Figure 1. Cut a narrow slot for the sight or barrel lug.
A front sight slot must be the full depth of the sight base, to allow the lower edge of the blade to touch the barrel. File away the raised ears for a front sight.
A rear sight slot should be 0.030" to 0.040" deep, to a maximum of .062" (1/16") deep. A shallow slot will more easily form a raised dovetail. The initial slot must be narrow enough to allow the 60 degree angled edges of the sight overhang the slot. The undercut will be formed, and edges raised, by the dovetail chisel.
The undersize slot may be cut with a milling machine, or adjoining hacksaw slots smoothed with a file. Used for sights and underlugs, practice this technique on hidden underlugs first. Set key lugs full depth to place the key flush with the barrel's bottom.
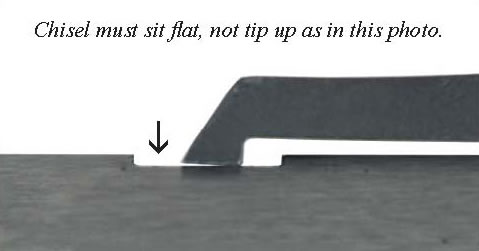
Figure 2.
Figure 2. Place the dovetail chisel in the undersize slot. It is very important for the foot of the chisel to sit flat on the bottom of the undersize slot. If the chisel is struck as shown, with the foot tipped upward, it will leave a small step in the corner, that must be removed with a three corner fi le with one safe-edge. Carefully inspect the chisel angle, before you begin striking the rear edge to form raised moldings above the undercut edges.
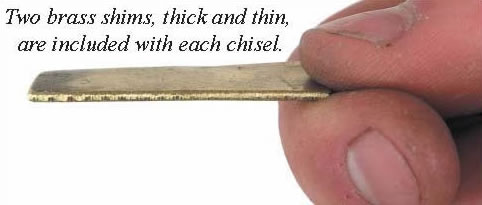
Figure 3.
Figure 3. Depending on the depth of your slot, one or two brass shims may be needed to level your chisel. Two thicknesses of brass shims are provided.
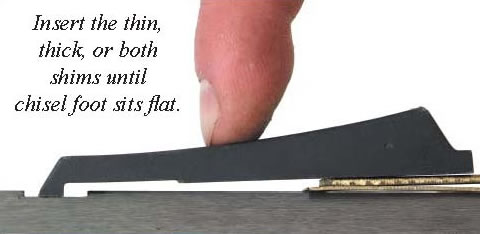
Figure 4.
Figure 4. Place the thin, thick, or both brass shims below the base of the chisel, until the chisel foot sits flat, or is tipped downward slightly. If you do not have the chisel oriented properly it will leave a small step in the corner of the dovetail. If no shims are used in a shallow notch, the undercut slot may tip upward. Raise the dovetail, forming a molding, with repeated hammer strikes to the rear edge of the chisel.
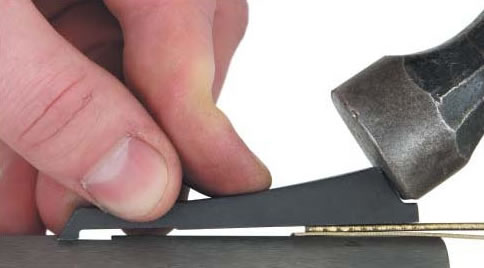
Figure 5.
Figure 5. Place the chisel edge at a corner of the undersize slot. Hold one hand on the chisel arch, to brace it. Strike the angled flat at the rear of the chisel. Several light blows will lift an edge more easily than a single heavy blow. Rice, Colerain, Getz, Goodoien and other barrels made of 12L14 steel work easily. Green Mountain barrels are slightly harder 1137 steel. Douglas, or Spanish, Italian or other imported barrels are often drawn steel, work hardened, very difficult to form, not recommended for use with this tool.
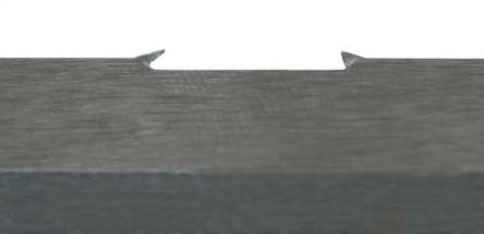
Figure 6.
Figure 6. Once the first edge is raised, repeat on the opposite side. The chisel has high relief to clear the first raised edge, to prevent any damage.
The slot above is shown with lifted dovetail edges formed to create moldings on either side of the sight. If you did not have the dovetail chisel nose flat against the bottom of the slot, you may find a small step inside the corner of the dovetail. If this occurs, it must be removed with a safe-edge triangular file, before fitting the sight. Use Swiss pattern needle files to shape the raised ears into attractive moldings.
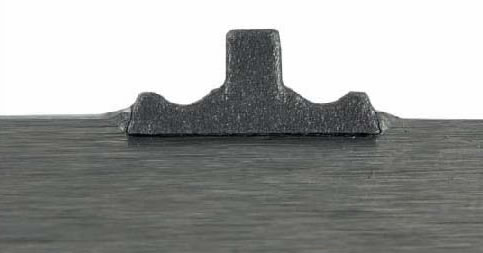
Figure 7.
Figure 7. Debur the sight base. Remove any casting gates with a file. By convention, install the sight from the lock panel side, right to left. Gently tap it in place with a brass or hardwood drift punch to prevent marring the sight or barrel fl ats. To remove the sight, drift it the opposite direction, from left to right.
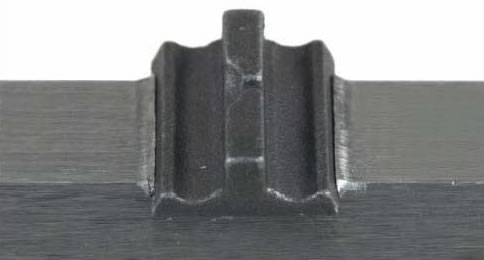
Figure 8.
Figure 8. Installed on an octagon barrel, in a raised dovetail, the sight base is wider than the dovetail, to extend past the side edges of the dovetail slot. When zero'd, strike a center-mark across the front joint.
Made of hardened steel for long life, use a whetstone to hand sharpen the edge at a 60 degree angle.
Instructions for drilling a touch hole
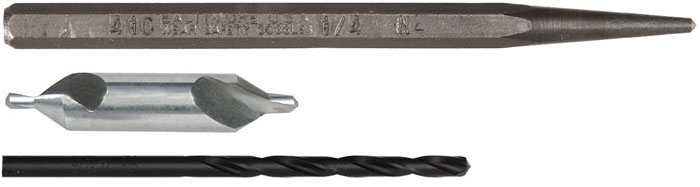
Tools:
Centerpunch, #1 centerdrill, 1/16" drill bit, drill press.
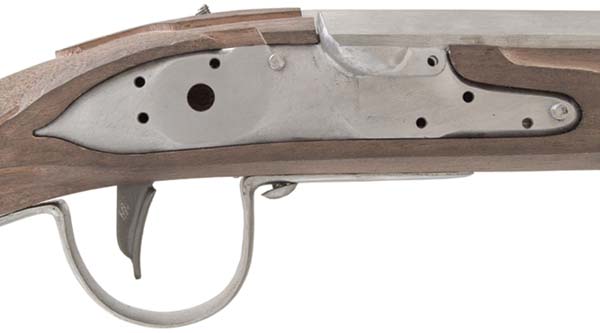
Figure 1.
Figure 1. You must have your lock plate installed against the side flat of the barrel. Secure the lock plate with the lock bolts.
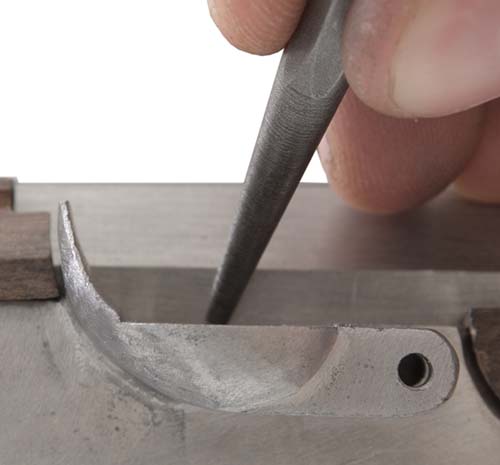
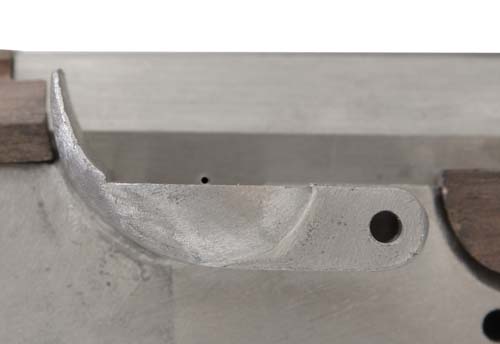
Figure 2.
Figure 2. Center punch the touch hole location. The mark should be at the center of the pan, even with the top edge. Hold your punch as perpendicular to the barrel as possible.
The center punched mark should appear as shown when viewed directly from the side.
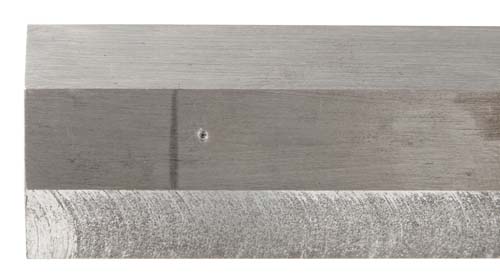
Figure 3.
Figure 3. Locate the face of the breech plug on the outside of the barrel and draw a pencil line. Remove the breech plug from the barrel.
This is important, if the drill bit hits the plug face it will deflect and can possilbly break the drill bit.
Note: India made muskets will often have the breech plug face at the center of the pan or slightly past. The breech plug will have a angled groove cut in the face.

Figure 4.
Figure 4. Install a #1 center drill in the drill press with the spindle set at 900 RPM or the next slower speed.
Drill the barrel at the center punch mark. Drill just to the depth of the short tip.
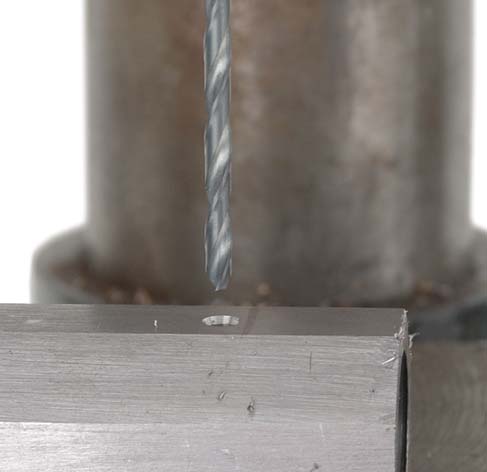
Figure 5.
Figure 5. Insert a 1/16" diameter drill bit into your drill press and set the spindle to 2000 RPM or the next slower speed.
Drill through the wall of the barrel making sure not to drill into the opposite barrel wall.
Remove the small burr on the inside of the barrel left by the drilled hole.